Step 1 - Enable NFS on the Synology NAS
If NFS is not enabled on the NAS, you must first enable it. The checkbox for the setting can be found under:
Control Panel → File Services → Win/Mac/NFS → NFS Service → Enable NFS
For further details and screenshots on how to enable NFS see these instructions within the Synology guide on setting up NFS.
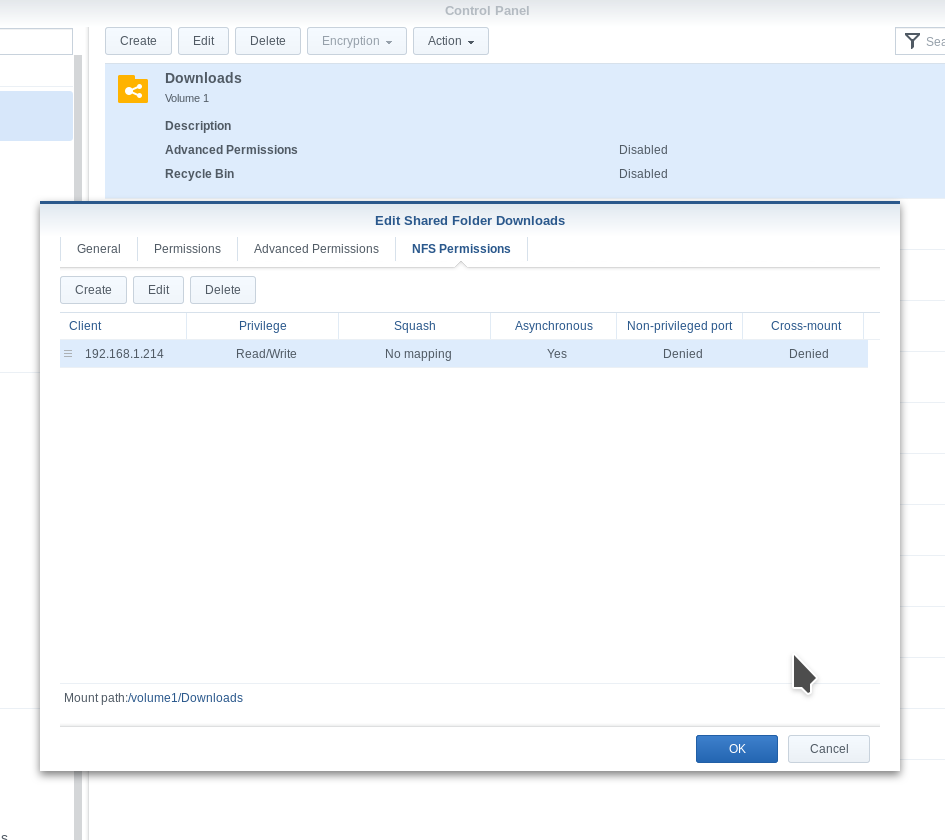
Step 2 - Create/Edit a Shared Folder to Add NFS Permissions:

Step 3 - Make Sure nfs-common is Installed
sudo apt install nfs-commonStep 4 - Mount a Share
Create a target directory for your mount point, and execute the following command adjusted with the NFS server IP and the mount directory:
sudo mount 192.168.1.214:/volume1/Downloads /media/NAS/DownloadsStep 5 - Auto Mount at Boot
If it is desired for the NFS share mount to persist after reboot/shutdown, add an entry to the /etc/fstab file:
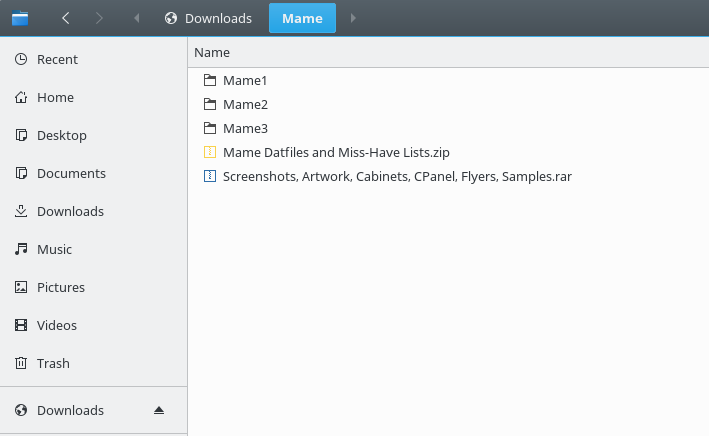
192.168.1.214:/volume1/Downloads /media/NAS/Downloads nfs rsize=8192,wsize=8192,timeo=14,intrThe mounted share should now be accessible on the client. Check via the CLI or file manager of your choice:

Helpful Links
- Old but helpful for steps 1 and 2: https://www.ryananddebi.com/2013/01/15/linuxmint-or-ubuntu-how-to-automount-synology-shares/
- Info about the client configuration (steps 3, 4, and 5): https://help.ubuntu.com/lts/serverguide/network-file-system.html#nfs-client-configuration
- Synology Support Center guide to setting up an NFS share: https://www.synology.com/en-global/knowledgebase/DSM/tutorial/File_Sharing/How_to_access...
Updates
These steps are also working for Ubuntu 19.10, (and I assume they work on versions inbetween, such as the 18.04 LTS release, and also probably the 16.04 LTS release prior).